Exercises for pain – Lower Back Pain
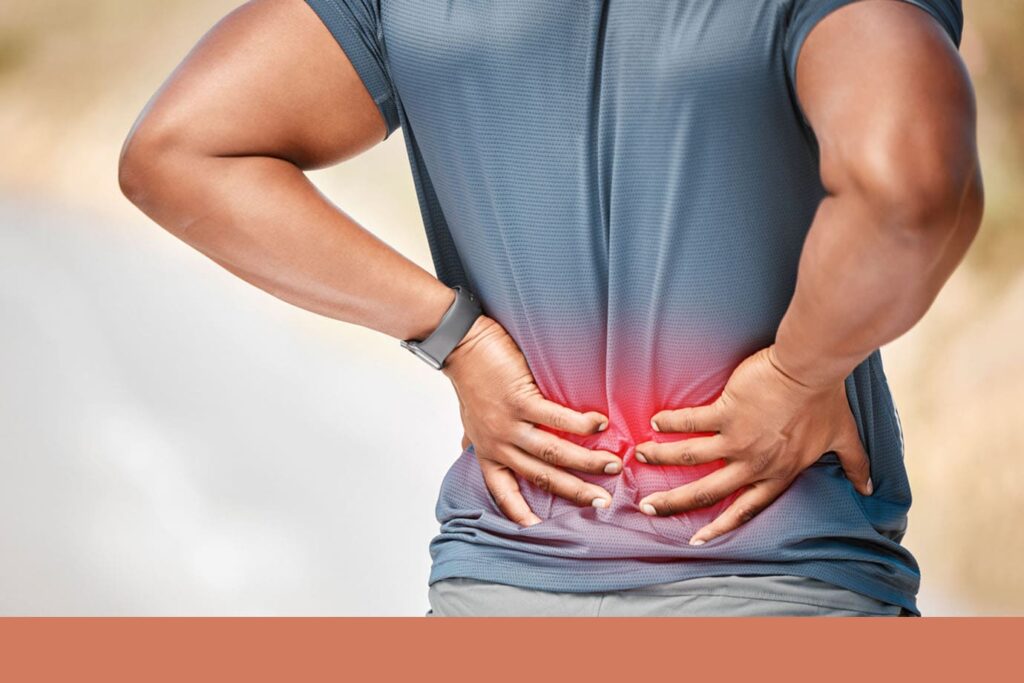
Exercises for Lower Back Pain
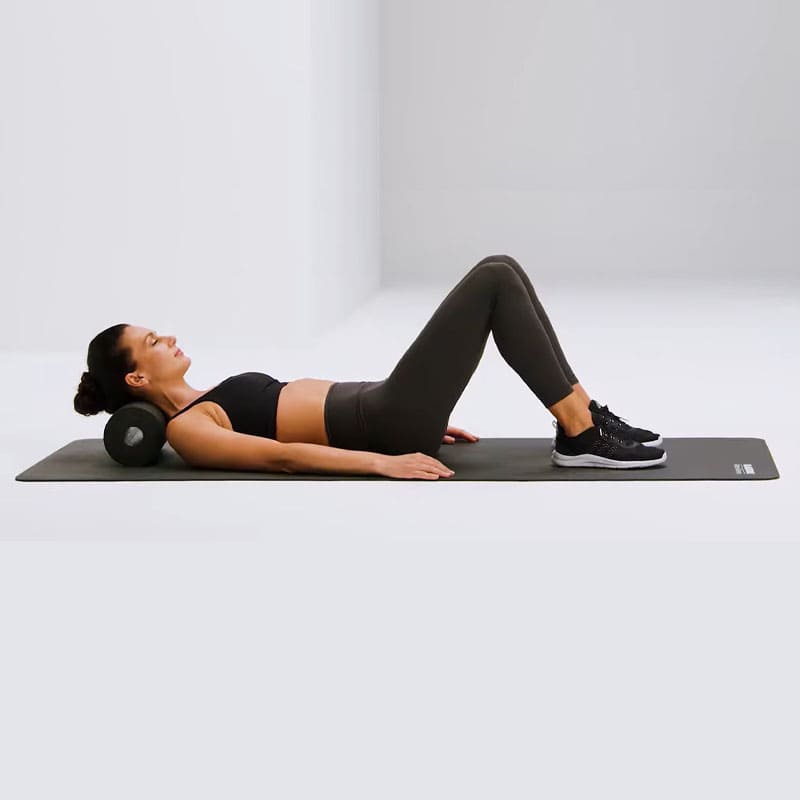
Easier to do exercises for neck pain and headaches
Discover all of the neck exercises you can do using the foam roller.
The foam roller, which is used on the neck, provies a feel-good massage. And the best thing: you can use the massage roller yourself to release tension in your neck. Approach the massage roller exercises for the neck with care – it may be more comfortable for you to work with the BLACKROLL foam roller which is 20% softer.
Please be aware of your own performance limitations. If you feel short of breath or dizzy, you should stop. Talk to your doctor about what you should be aware of.
How does lower back pain occur?
Lower back pain is usually caused by a lack of exercise, poor posture, or overexertion. If we spend a lot of time sitting and do not spend enough time on balancing movements, this can lead to tension and shortening of the hip flexor muscles, which extend from the pelvis down to the legs. If the hip flexor muscles shorten, the back extensors respond with counter-tension to compensate for the shortening.
This puts pressure on the lower spine, which leads to even more tension in the back muscles and lower back pain. This is often compensated for by an unconscious protective posture, mobility is increasingly limited, blood circulation in the muscles is impaired, muscle tissue hardens and shortens further, and the surrounding fascia sticks together. If these processes continue over a long period of time, degenerative damage to the skeleton, vertebrae, and intervertebral discs can occur, which can cause chronic back pain.
Heat can provide relief, such as a hot water bottle, heating pad, heat patch, or heat packs for lower back and hip pain.
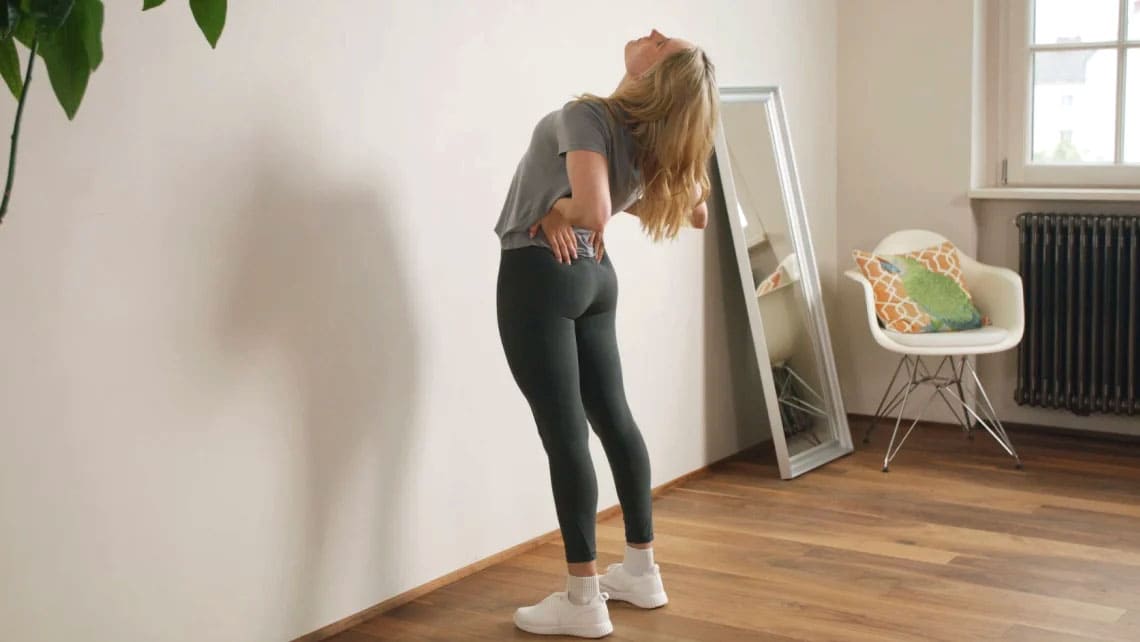
Exercise 1 - Stretch the Front
Often the cause of lower back pain is not in the back itself, but in the front of the torso, pelvis, and hips. By specifically stretching the hip flexors, the muscles and fascia there and in the back can become more flexible and loose over time. You can do this exercise over and over again without any aids, both on days when you are on your feet a lot and as a counterbalance on days when you are sitting a lot.
Step 1
Stand up straight with your feet hip-width apart. Place your palms on your buttocks.
Step 2
Now stretch the front of your body, slowly leaning your upper body back. Your arms support this movement and push the bars forward. Continue stretching in this position for one and a half minutes.
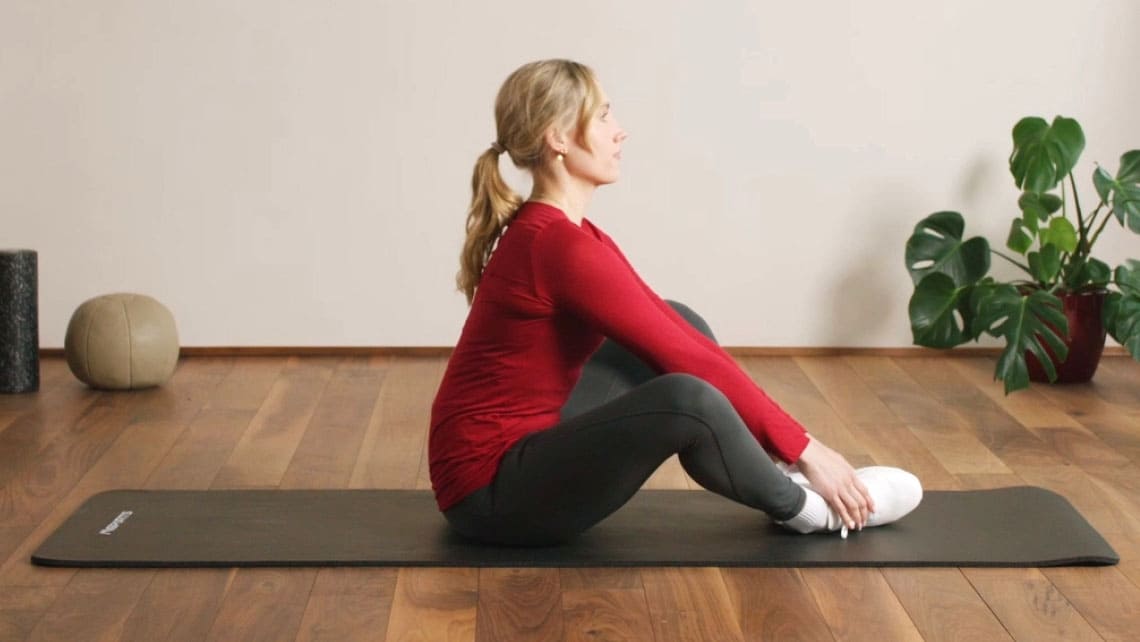
Exercise 2 - Stretching the Back of the Body
This exercise can be used for both acute pain and preventive purposes. Improves mobility of the lower back and hips. At the same time, tension in the back of the legs is relieved. For this exercise, you only need a mat (optional).
Step 1
Sit on a mat or directly on the floor and stretch your legs forward. Spread your knees apart and bring the soles of your feet together. Try to grab your feet with your hands and pull your torso forward. Do not round your back, but remain straight.
Step 2.
Keeping your back straight, slowly lean your torso further and further forward toward your legs. Inhale and exhale deeply. With each exhalation, move forward a little. Stay in this position for at least one minute.
Step 3
Stand in front of a wall. Take a small step back with your right leg and place your left foot directly in front of the wall. Now place your right hand on the lower part of your right buttock. Push your buttocks forward and also actively push your groin forward while your upper body leans back. Please avoid arching your back too much. Do the exercises for two to two and a half minutes, gradually deepening the stretch. Then turn over to the other side.
Exercise 3 - Adductor Stretch
The adductor muscles are a group of muscles that bring the thigh into the hip joint position. They run along the inner thigh from the pubic bone to the knee area and stabilize, among other things, the hip joint. If the adductor muscles are shortened, the pelvis can no longer straighten properly, which negatively affects the natural shape of the lumbar spine. Therefore, stretching and relaxing shortened adductor muscles can be useful for lower back pain.
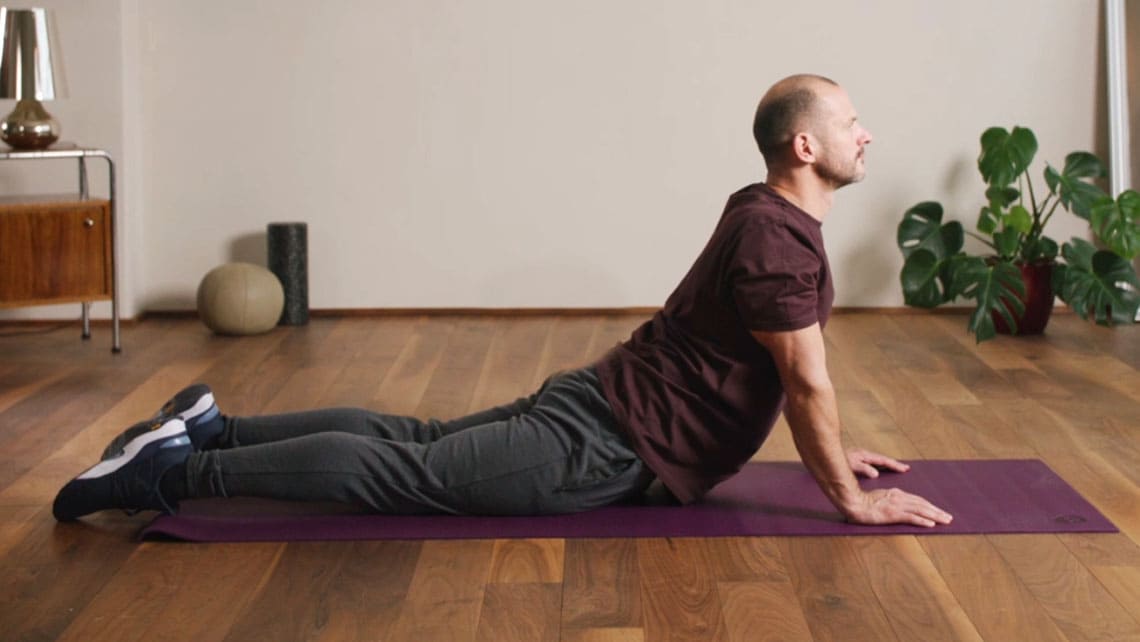
Exercise 1
Get on all fours, keeping your arms and hips vertical. Arms are extended, palms are on the floor, fingers are pointing forward. The back is completely straight, without sagging.
Slowly move the barbells forward and lower them to the floor. Keep your upper body upright, arms extended (if you lack arm strength, you can also use your forearms for support). Wait until the pain from the stretch subsides, then give in and lower the bars even lower. Stay in this position for 30 seconds.
Exercise 2
Now, in this position, bend your right knee to the side and place your right heel on the knee of your extended left leg, with the sole of your right foot touching the inside of your left shin. The pelvis tilts to the side and the tension in the groin changes: this creates additional tension in the adductors.
Now try to align both sides of your thighs forward and toward the floor. This should increase the tension in your inner thighs. If you want to stretch even more, lift your upper body onto your hands. You can also clench your hands into fists to better support yourself. Stay in this position for 30 seconds, then switch legs.
Exercise 4 - Improve Mobility
This exercise will stretch the extensor muscles of the back and the back of the legs, and improve your mobility. At the same time, alternating between the two positions will stimulate blood flow to the intervertebral discs. To begin, you will need a chair.
Caution: Lower your torso only as far as you feel comfortable. You may experience slight pain when stretching your legs.
Step 1
Stand in front of the chair with the seat in front of you. Lean with both hands either on the back of the chair or directly on the seat, depending on how far you can reach. With your legs straight, lower your torso until you feel a distinct stretch in the back of your legs. Continue relaxing for one minute.
The long-term goal of this exercise is to eventually be able to do without a chair and support yourself with your hands on the floor, keeping your legs straight.
Step 2
Next, do a balance stretch: stand up straight with your feet hip-width apart. Place your palms on your lower back and gently lean your upper body back. If your neck is comfortable, you can also tilt your head back. Stay in this position for one minute.
Step 3
Repeat the exercise from the beginning and now lean forward again. Keep your legs straight and go as low as you can. You may now be able to touch the ground with your fingertips!
Hold the stretch for 60 seconds.

Exercise 5 - Release Your Hip Joint Lock
If you have a hip joint lock, you can use the following exercises to release tension in the hip area and thus mobilize the hip joint. You will need a small object with which you can press on specific muscle points, such as a massage pen or an everyday object (such as a wooden handle, a door stop, or a bottle cap). It is important that the object fits well in your hand and is soft or round at the point of pressure.
Exercise 1
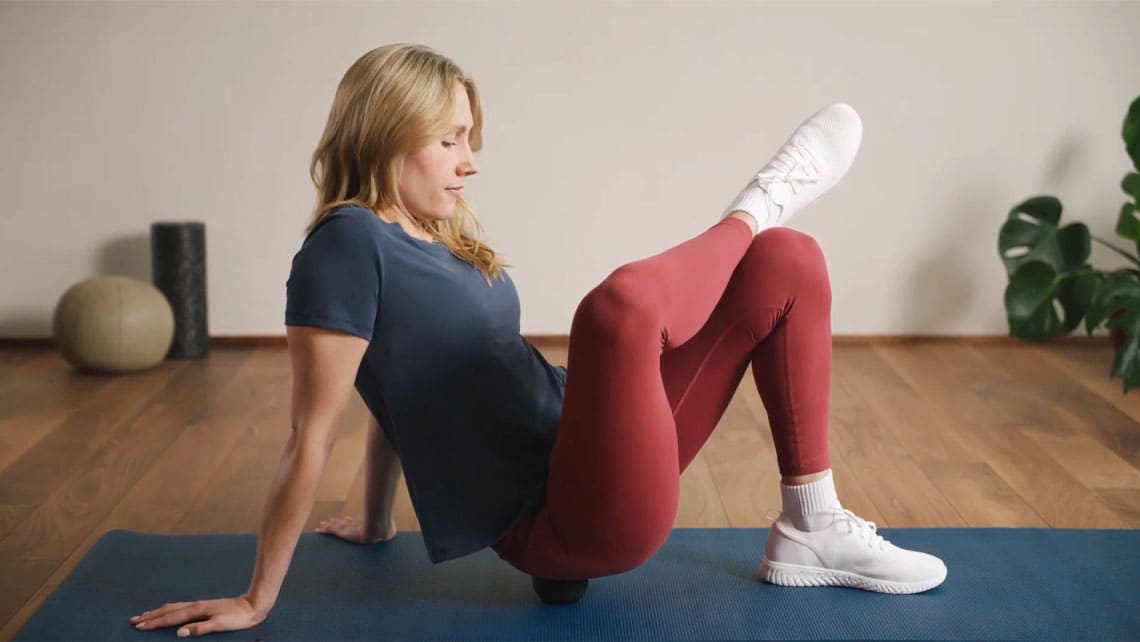
Place a pusher or other object, such as a ball, at the exact point on your buttocks where pain occurs when walking or lifting your leg, and carefully sit on it. If the area is too sensitive, you can also do the exercise against a wall and lean on the button/object while standing. Stay in this position for one minute. As the pain subsides, you can slightly change your body position to work a larger area around the point.
Exercise 2
Lie on your back and feel the femoral spine, which is an easily palpable bony protrusion at the front of the right and left hip (where there is a small pocket on the front of jeans).
From the femur, move slightly inward and downward and find a point that is painful to pressure. At this point, press a button or some everyday object into the fabric from above. Hold pressure on the point for one minute. Then find the point on the other side and press there as well.
It is important to move slowly and with pressure. Perform the exercise for one minute and change sides if necessary.
Exercise 6 - Relieve Piriformis Syndrome
When the piriformis muscle underneath the gluteus maximus becomes tight, it can irritate the sciatic nerve. The resulting pain can radiate from the buttocks down one leg, making sitting and other movements painful. You can relieve the symptoms with these exercises, which will give you immediate relief. You will need a mat (optional) and an elastic band.
Tip: Incorporate these exercises into your daily workout routine to prevent piriformis spasms.
Exercise 1
Get on all fours, arms extended, palms flat on the floor, fingers pointing forward. Spread your knees apart and bring the soles of your feet together. Slowly push your groin (not your stomach) forward and lower it toward the floor. With each exhale, relax even more and hold the stretch for 20-40 seconds.
Exercise 2
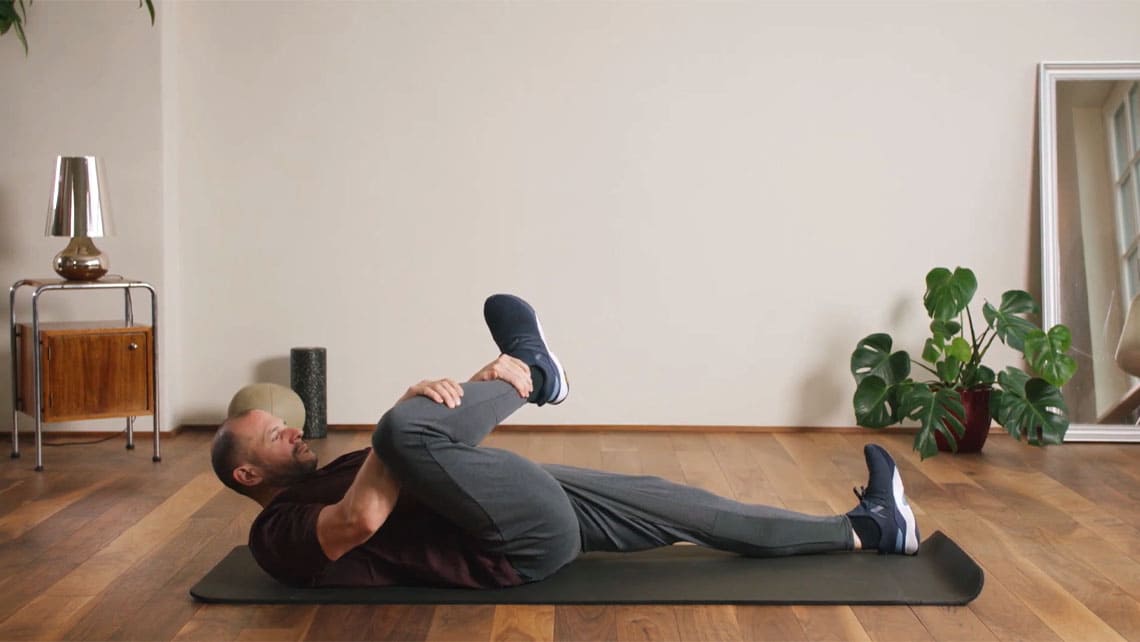
Lie on your back on a mat or directly on the floor. Grab your right leg and pull your right knee up so that the top and bottom of your leg form an angle of about 90 degrees.
Now pull your right leg diagonally toward your left shoulder. You can feel which area is stretched the most. Hold the pull for 20-40 seconds, then switch sides.
Tip: Use a band if necessary.
Exercise 3
Sit up straight with your legs extended. Cross one leg over the other. Grab the raised leg with both hands and pull it toward you.
Important: Try to sit up straight.
Hold the stretch for 30 seconds.

Exercise 7 - Removing Lumbar Spine Blockages
With this exercise, you will be able to gently remove the blockages in the lumbar spine. You will need a mat or you can train directly on the floor. Change positions very slowly and do not train until you feel pain.
Step 1
Get on all fours, extend your arms, place your palms on the floor at hip width, fingers pointing forward. Bend your torso forward and slowly lower the barbell forward to the floor. Arms are extended, shoulders are pulled back, head straight. Feet are extended upward, toes are on the mat.
Step 2
Now alternately press your right and left knees to the floor. Repeat this process several times. You should notice a slight increase in stretch.
Step 3
To deepen the stretch, relax your knees again and allow your groin to sag even further. Repeat the tension, relaxation, and stretch sequence several times.
Step 4
Then reverse the movement by pushing your butt back and allowing your torso to slide toward the floor as far as possible. Your arms are extended, with your forearms on the floor. Stay in this position for one to two minutes.
Exercise 8 - Relieving Sacroiliac Joint Blockage
Very often, lower back pain is caused by problems with the sacroiliac joint, sciatic nerve, and pelvic musculoskeletal system. Back pain can radiate to the buttocks, groin, and knee. With the following sequence of exercises, you can relieve acute pain on your own. You will need a mat (optional) and a chair, as well as a soft seat, such as a chair or sofa.
Exercise 1
Kneel on a mat or directly on the floor in front of a chair or sofa and rest your forearms on the seat (if there is no soft seat, you can also put a pillow on the chair). Move your knees back far enough to allow the groin area to sag.
Once you have the correct position, slowly lower yourself, starting from the groin. Hold the stretch for 20-30 seconds.
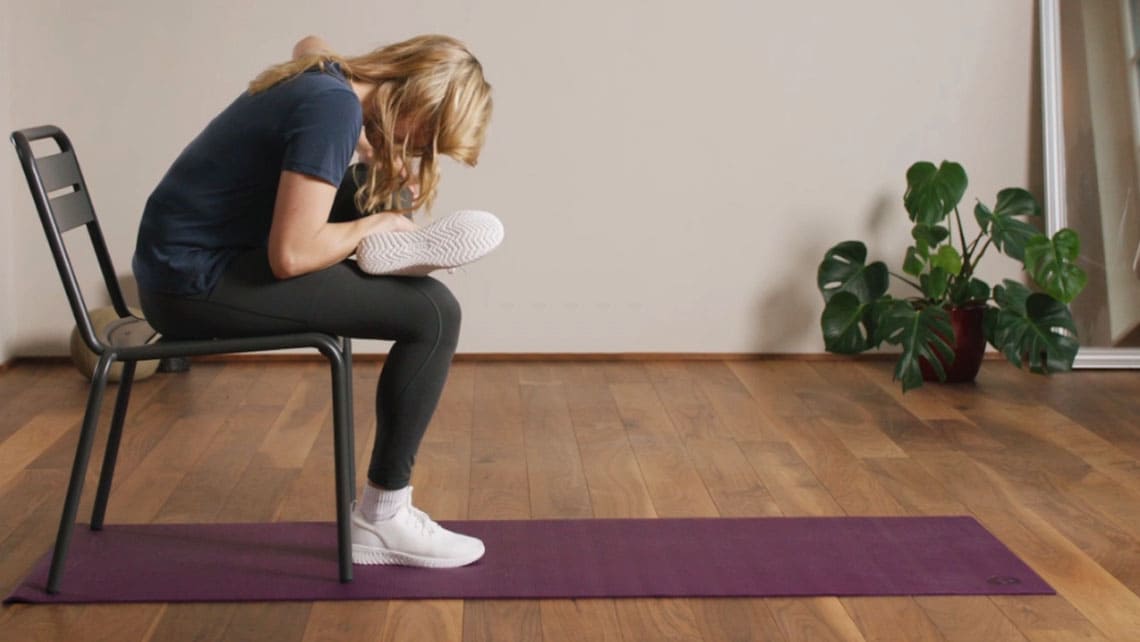
Exercise 2
Sit on a chair and cross your left leg over your right. Your left ankle rests on your right thigh just in front of your knee.
Now arch your back and bend your torso forward and down until you feel a definite pain in your back or a distinct pain from the stretch. When you can no longer bend your torso forward, round your back. Stay in this position for about 30 seconds.